Studio | Renovations : Floor Oiling & Door Loving

After we finished laying the floor, we were physically tired and spent a couple of weeks away from the studio. Well and truly in the midst of lockdown, we were working from home and catching up with our business.
Before long, oil samples had arrived and we were back to it testing the options on offcuts.
We wanted to maintain the colour of the freshly laid wood so needed to prevent it darkening and yellowing. Although highly impractical for a work environment, we also wanted a matte finish. This will make it harder to clean and remove marks but we'll just have to make sure we wipe our feet and learn to love any marks that are bound to occur over time!

The options we tried were:
1. Woca Softwood Lye & Woca Master Floor Oil White
2. Woca Softwood Lye & Woca Master Floor Oil 118 Extra White
3. Osmo Polyx Oil White 3040
4. Osmo Polyx Oil Raw 3044
The first option is a combination we have used on our bedroom floors at home. It has kept the original pine floorboards light and greyed off the colour slightly. If anything, they seem to be lightening over time and we love the way they are wearing, so we thought this was what we would use in the studio.
Thank goodness we tested samples first! The way the new studio floorboards reacted to the Woca process was totally different to how our old orginal ones did at home. The pink areas went purple and the light areas turned quite yellow. It looked awful.
So, we were left with the two Osmo options. We have friends that have used the Osmo White on a floor made from old scaffold planks that looks amazing but again it wasn't right on our samples as it looked too pigmented, almost like watered down white paint. The Osmo Raw 3044 was the winner as it lightened the wood a little whilst allowing the natural tone to come through. We had plenty of great advice from the guys at Wood Finishes Direct who guided us through the Osmo process and advised us what we needed to buy and hire for the job.

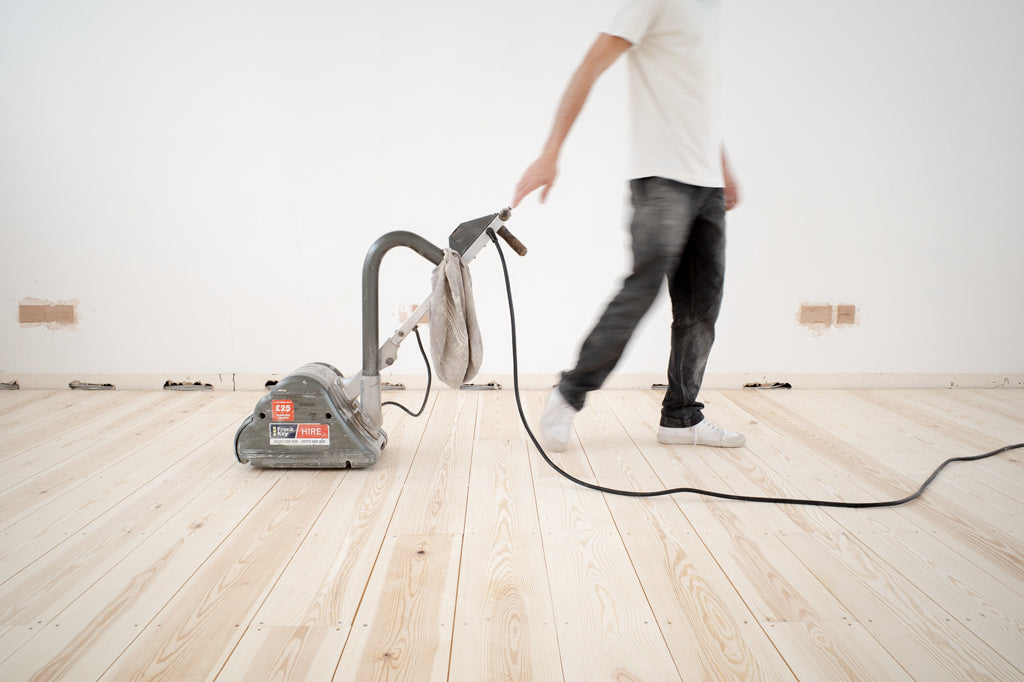
Ian went over the floor multiple times with a hired floor sander, both diagonally and then along the line of the floorboards. Then round the edges with an edge sander.
Our poor old hoover was then put to work so hard it never recovered and we had to replace it!


Ian and I took it in turns to apply the Osmo Oil in a thin layer with a roller. It goes on pretty easily but the repetitive process on such a large area is more tiring than it looks! We left it to dry over night.

After the first coat of oil we used a buffer to 'de-nib' the floor. In all honesty, we were going to skip this part because we couldn't find much information online about de-nibbing but we were advised that it was worth doing so we hired a buffer. In a nutshell, oiling the floor lifts the grain of the wood and running a buffer over it is like doing a very light sand that smooths it and basically gives it a nicer finish. It works and we're glad we did it.
Then for the final coat of oil (arms dropping off by this point!) ...


Not sure we've ever felt so relieved to finish a job. A huge undertaking but the floor looks great and we're very proud of ourselves for doing it.
--
The door in the below photos was an eBay find from an old school in Derby. I love the rippled glass.
We painted it using some leftover paint that we had from a trade show stand, it's Paint & Paper Library Stone IV. We removed and cleaned the original hinges ourselves and had the lock cleaned and keys made for it at a local locksmith (Halls Locksmiths in Nottingham). The door knob is from Rowen & Wren who have some great hardware.
A lovely little project that was too good not to document.


We're almost there! Now that the floor is finished and the door locks, we can move in and finish the details over the coming weeks.
Can't wait to be working from here and also for lockdown to be over so we can welcome visitors into our new studio space.